Creating and deploying plugins
Task
Create a custom plugin using the Amplify CLI and use it in an amp (chatbot).
Plugin infrastructure
When creating plugins for Amplify, it can be advantageous to have a grasp of the infrastructure behind them. A plugin is essentially a node that be utilised in amps, which ultimately returns data for a different type of node that will then be displayed in the output.
So, when an amp encounters a plugin node during the conversation flow, it triggers the plugin handler. The handler subsequently return a data object for a specific node to be rendered after the plugin handler has done whichever calculations, data fetching, syncing or other it has been configured to do.
This also implies that plugins don't provide actual code for what will appear in the amp output; instead they return data for a specific type of node within Amplify. This setup allows you to create plugins that retrieve relevant information based on the user’s context (the storage saved based on the user’s selections) and display personalised content in carousel or buttons - among many other things.
One important consideration when working with plugins, is the plugin handlers execution timeout limit of 5 seconds. If the code takes longer than this time frame to execute, then the method will be cancelled and users will receive an “Error: Plugin timed out” message in the amp output.
1. Create and deploy a plugin
Install and setup the Amplify CLI
Before you can start creating any plugins for Amplify, you first need to set up the CLI on your computer.
Ensure that you have Node.js (at least version 18) and npm installed (see https://docs.npmjs.com/cli/v9/configuring-npm/install).
Install the CLI globally by using npm:
npm install @anthill.technology/amplify-cli --globalDetailed CLI documentation can be found here: https://www.npmjs.com/package/@anthill.technology/amplify-cli
Ensure that it was installed currently by typing in the command:
amplify --version, it should output the currently installed version of the CLI.You can then see all available commands of the CLI via the
amplify --helpcommand.
Login to Amplify
To be able to create plugins, the CLI needs to ensure that you have the correct access and to know, which organisation the plugin should be created for. To do this, we need to follow the these steps:
Login to Amplify using the command:
amplify loginAn output will appear in the terminal. Please press any key to open an authentication page in your browser and validate that the code shown on this page matches the code in the terminal output. This is to ensure that you are validating your own login attempt and not someone else's.
After confirming the login attempt on the page, a confirmation page will be displayed. You can now safely close the page as you have successfully logged into Amplify via the Amplify CLI.
Hereafter we need to connect to the correct organisation:
Enter the
amplify usecommand.A list of all organisations, that you have access to, will appear.
Navigate up/down using your keyboard to select the organisation you wish to create a plugin for.
It is always possible to change the organisation by reusing the
amplify usecommand and choosing another organisation.
Creating a plugin
Now we have everything setup and ready to create plugins in Amplify.
The CLI will create files on your local machine for you to edit and publish to Amplify once all the development work is done. Therefore you will need to navigate to the path in your file system, where the files of the plugin should be placed, i.e.
cd ~/src/amplify-plugins.Thereafter, use the
amplify plugin:createcommand to start creating the plugin.You will be prompted to add a name for the plugin and select a plugin type.
To select the type you prefer using the keyboard arrows and selecting with the Enter key.
Hereafter you must enter a name for the plugin.
It will then create the plugin and create the necessary files on your computer.
The plugin is now initialised on Amplify, but is not yet ready to be used in an amp. For this we need to make edits and deploy those changes.
In our example we will create a simple “Hello World” plugin with the
messagetype:
Editing the plugin
As a note regarding how the plugins work: It is only possible to render a specific node type via a plugin, and it’s only possible to affect the output of a plugin and not do event listeners etc. If you need to get data (like the clicked button in a question or button node), then you will need to have a follow-up plugin, where you get the selected value based on a storage value.
We are now ready to edit the plugin to the output we want. First of we need to open the plugin files that were created during the previous step. The files created are:
File name | Description |
|---|---|
| This file configures the plugin with details such as name and which settings the editor can change in Amplify when using the plugin in a conversation. |
| This includes a handler that will be called when the plugin is triggered. It will run the handler, wait for any process to happen, and then use the returned object to render a node. |
| This is basic |
Setting up plugin configurations
In the config.js file we can define the configurations that renders in the Amplify builder, so for our example we will edit the file to look something like this:
module.exports = {
  id: '03d09c19-66b6-44de-b2dd-c47141d3b8a8',
  name: 'hello-world',
  type: 'message',
  settings: [],
};
Controlling the output of the plugin
For this we will need to open the index.js and define the node object, which is returned by the handler method in the file. For our example it would be as simple as:
exports.handler = async () => {
  return {
    type: 'message',
    delay: 1,
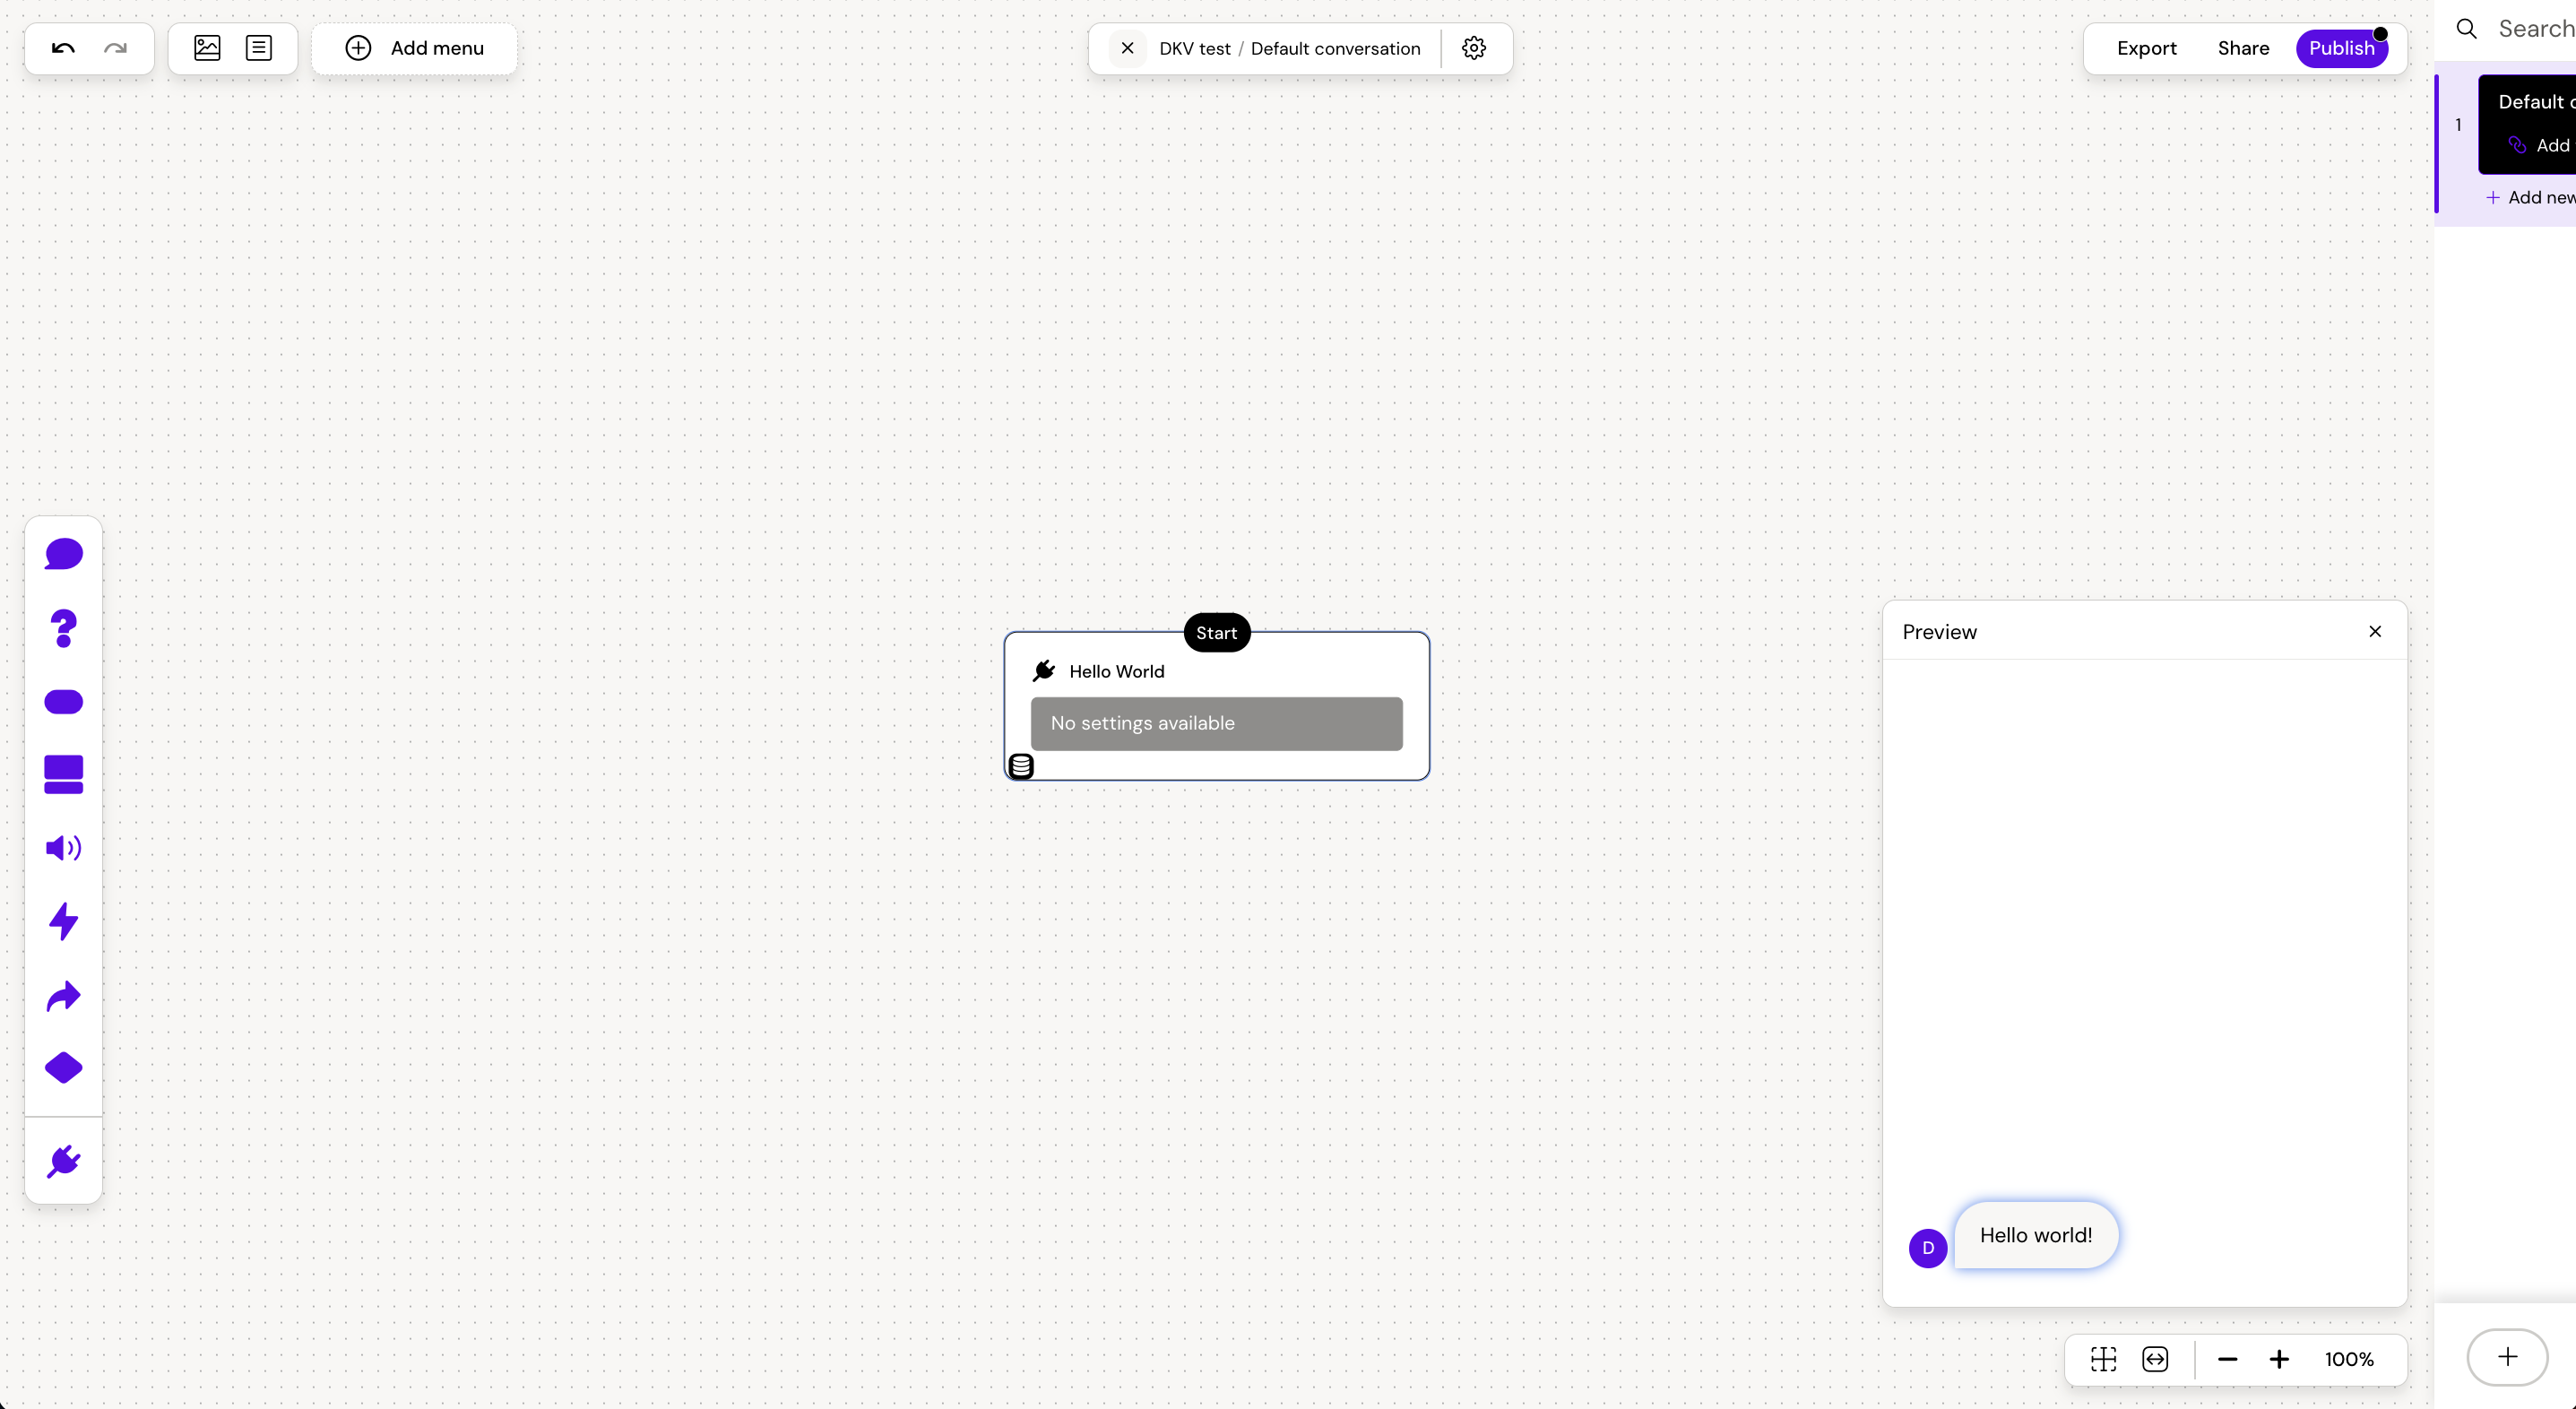
    html: '<p>Hello world!</p>',
  };
};
In here we could also decide to use external NPM packages. For this we simply need to install them using npm install in the plugin folder, and ensure that they are listed in the dependencies section of the package.json file. Thereafter we simply need to import the package using the require method.
Deploying the plugin
After all necessary modifications to the plugin has been made, we can deploy the changes to Amplify.
To deploy the changes, simply use the command:
amplify plugin:deploy --directory <path-to-folder>This will bundle and validate all the plugin files, and overwrite the existing plugin code hosted on Amplify in the previously selected organisation.
The plugin is now enabled and ready to be used in an amp in Amplify.
If you later have changes to the plugin, then re-run the deploy command to redeploy.
2. Use the plugin in an amp (chatbot)
When deploying a plugin the first time it will automatically enable it for use in the Amplify platform. And to use the plugin in an amp in Amplify, we have to do the following:
Open the amp in which you want to use the plugin.
Insert the created plugin into the conversation by following these steps:
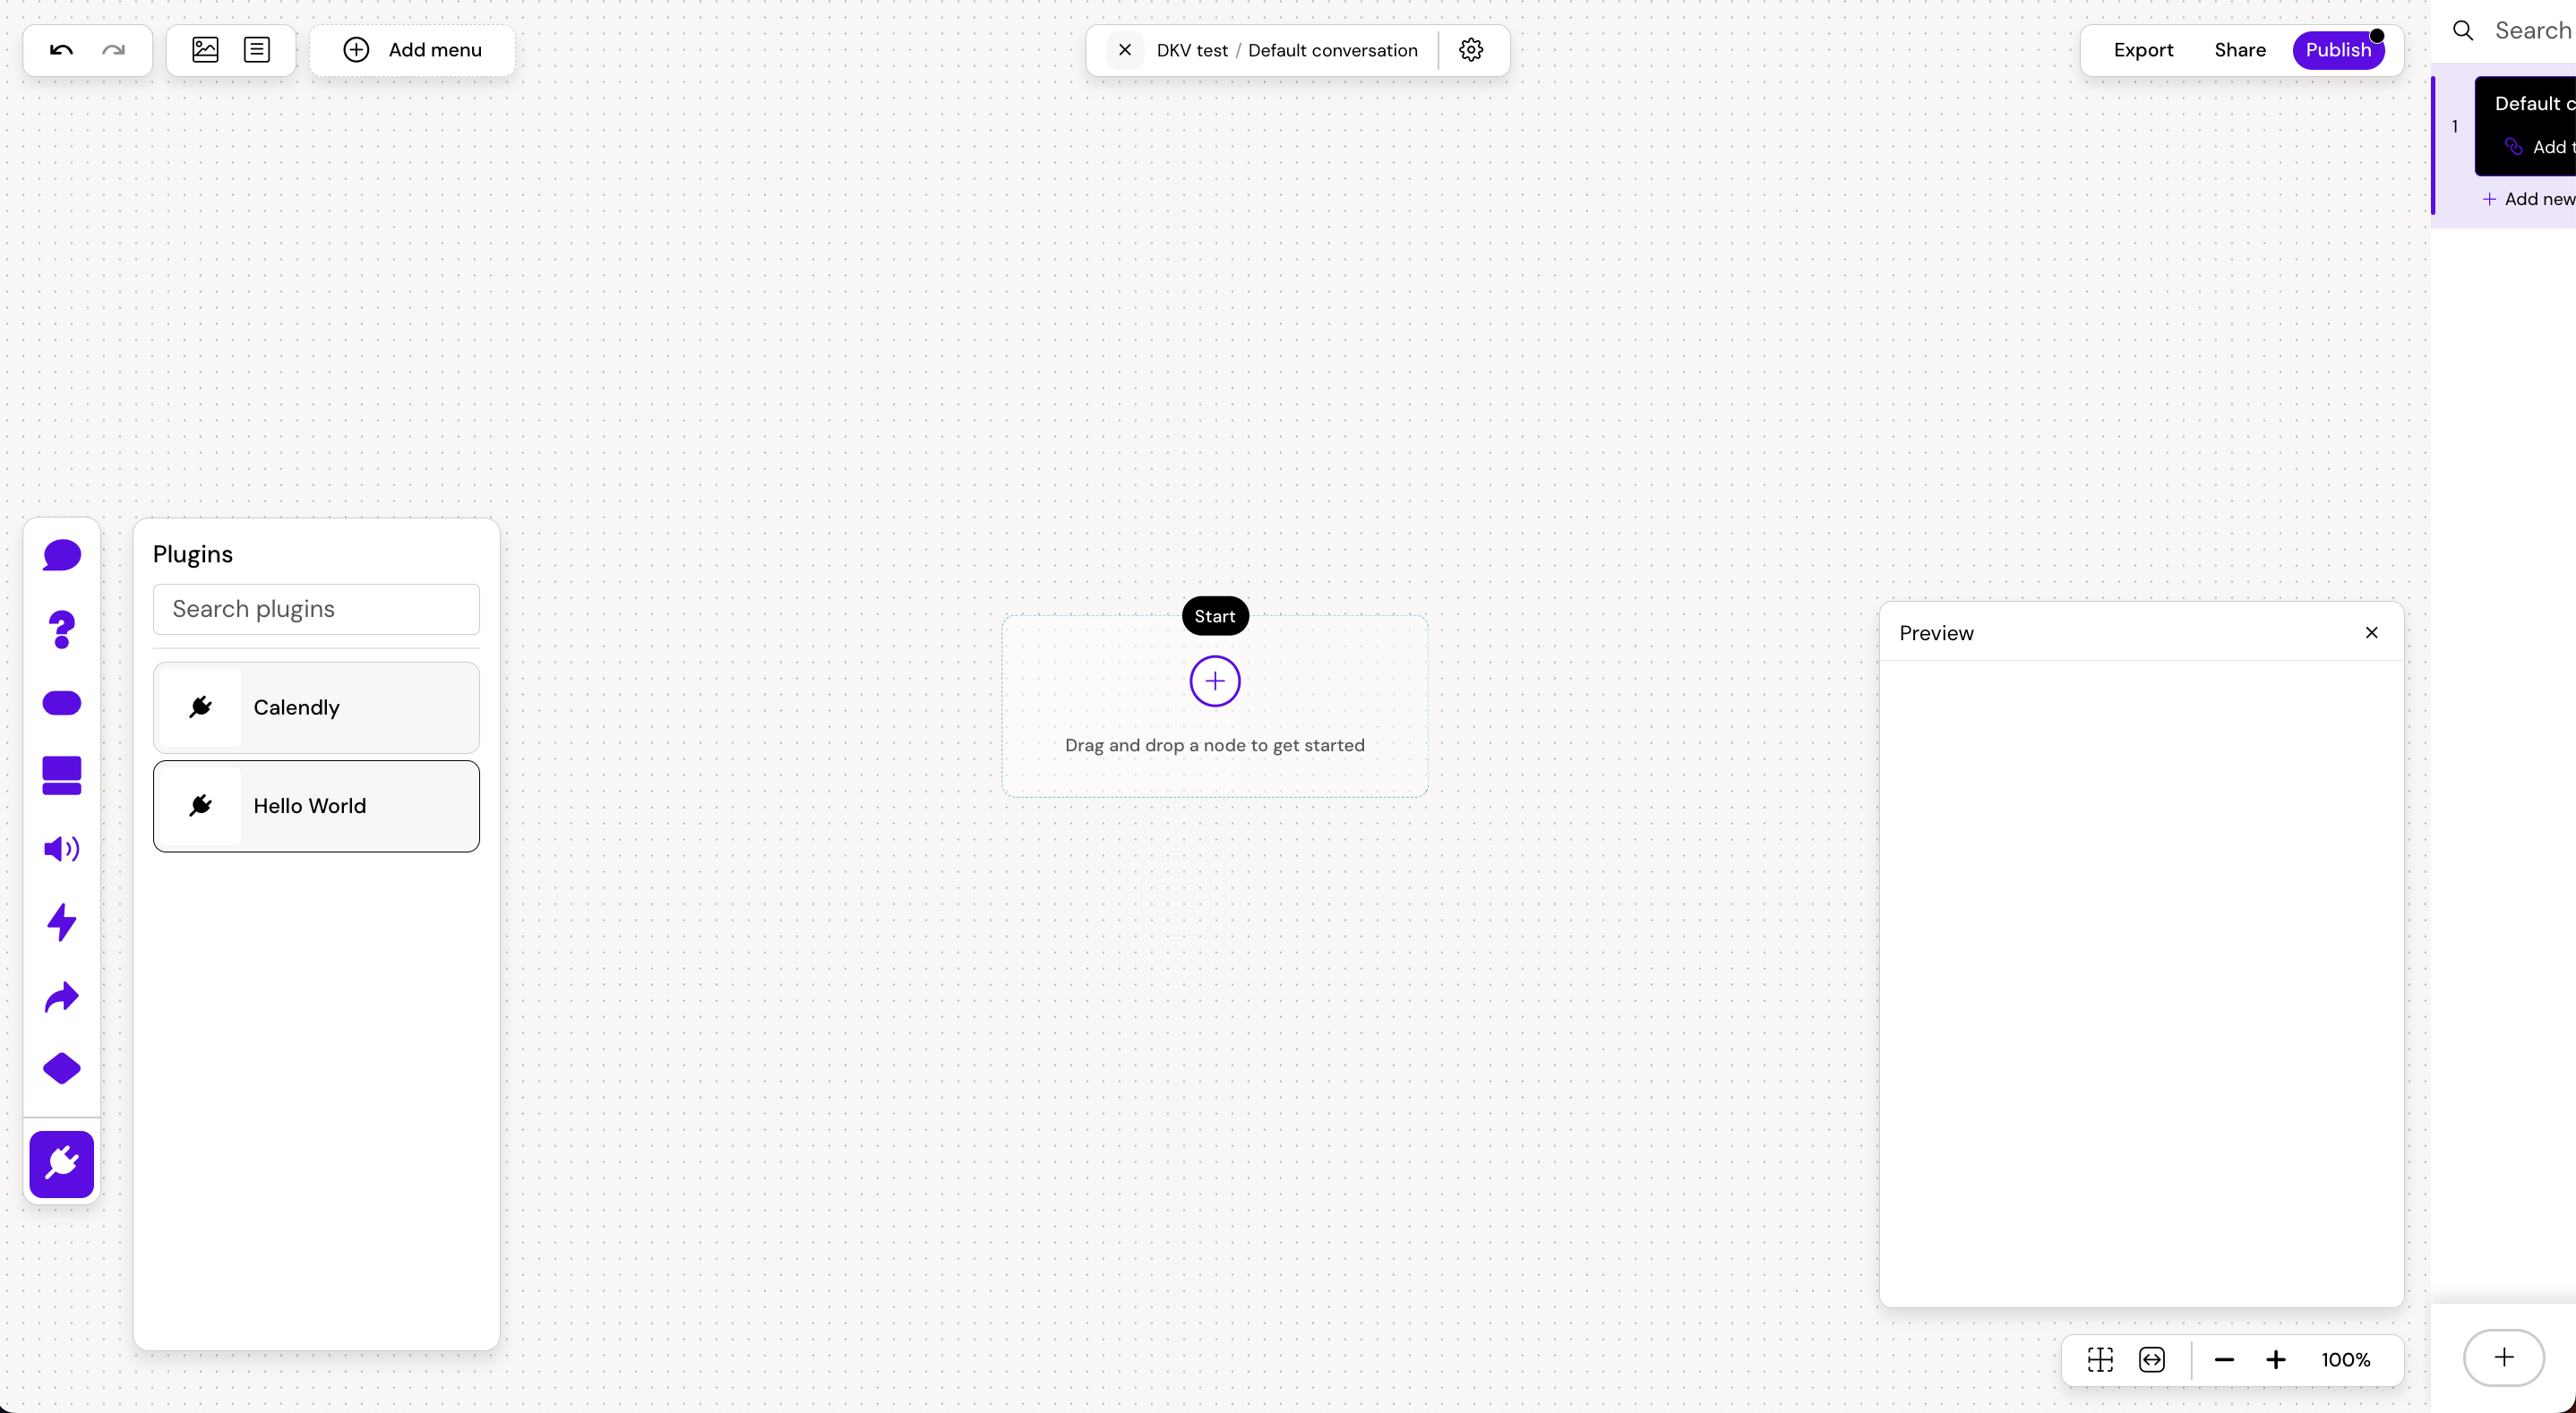
Click on the “Plugin” item in the toolbar to the left.
Find the specific you have created.
Insert it by either dragging it into the builder canvas or by clicking on the plugin and then on any “+” in the canvas to place it in that location.

Then by clicking on the inserted plugin node, you can change the settings that was configured in the
config.jsfile of the plugin - if the plugin has any settings configured.Now the plugin is ready and can be rendered in the preview or in the output after publishing the amp.

