
Publishing and Custom Domains
Publishing
The publish dialog is found in the top right corner. To make it easy, we have provided all amps with a test domain. This is a domain hosted by Amplify and should only be used for testing purposes.
To publish to the test domain, simply check the checkbox and click ‘Publish to selected domains’.

If you hover over the domain, you can also see two small buttons, one for editing domains and one for opening the domain in a new window. For custom domains, you will also have the option to delete the domain.
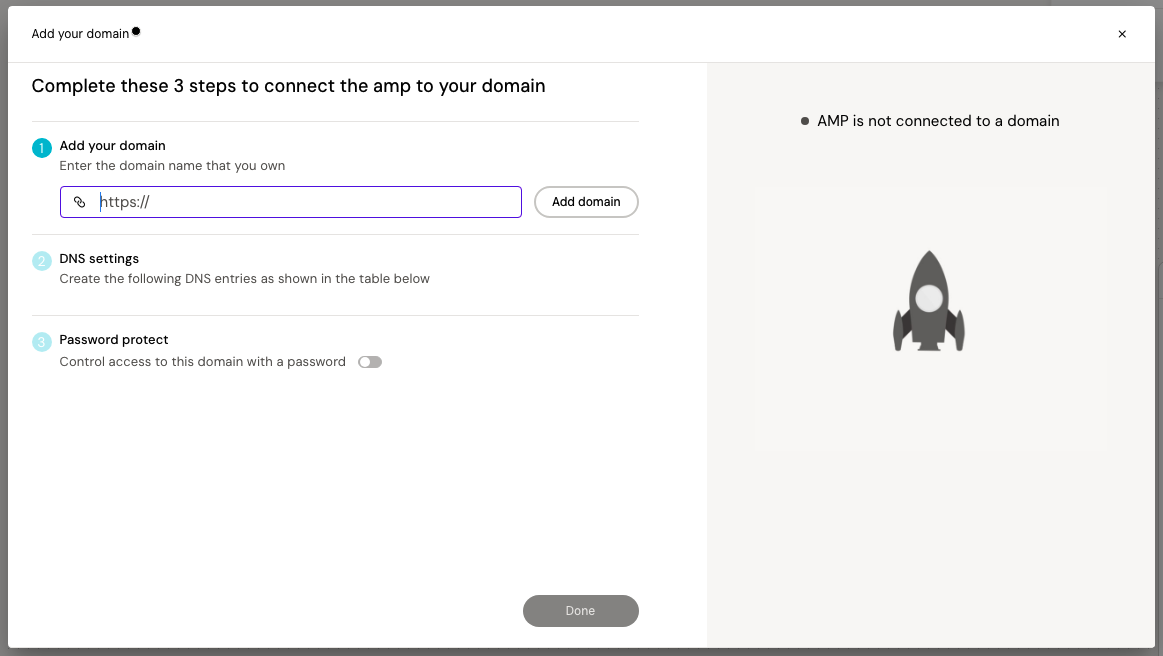
Custom Domain
Most often, you will want your amp out to live on your own custom domain. This is possible with a DNS setup.
Click the ‘add new’ button in the Publish popup to see the full deploy overlay. Add your custom domain in the URL field and click the ‘Add domain’ button.
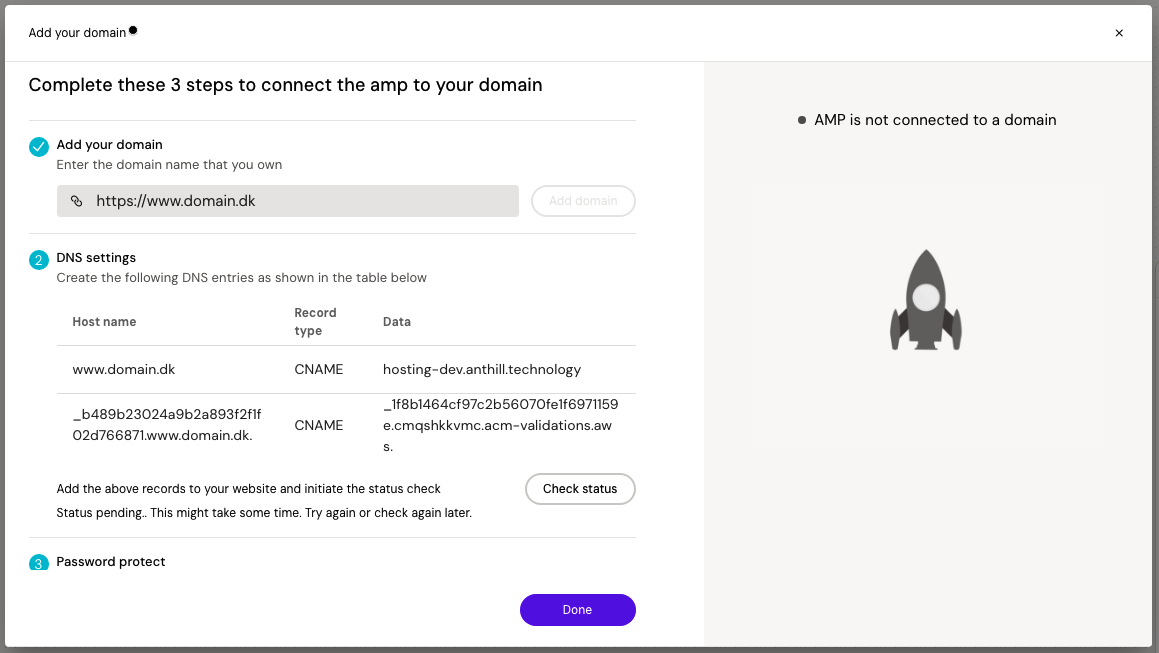
The DNS settings for the specified domain will be generated. This might take a little while. Copy the DSN settings and send them to your IT department or whoever is responsible for your domains.
Click the ‘Check status’ button (even if you know that the settings have not been configured yet) and click Done to close the overlay.
Once the DSN settings have been correctly configured on the domain, the validation will be successful and the amp can now be published to the domain.
The custom domain will now show in the Publish popup, where you can also see the current status and initiate a new status check.
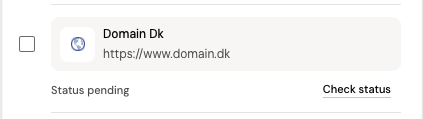
If you hover over the domain, you will see a small delete button, which enables you to delete the domain, if you made a mistake or no longer need it.